If you’re craving a dessert that combines the rich flavor of brown butter, gooey marshmallows, and melty chocolate, you’re in the right place! These Brown Butter S’mores Cookies are a game-changer for any sweet tooth. They are easy to make, and the flavors will take you back to warm summer nights by the campfire. Let’s dive into this delicious treat that will have everyone asking for seconds!
Ingredients
Baking these Brown Butter S’mores Cookies is fun and simple. Here’s what you will need:
– 1 cup unsalted butter (2 sticks)
– 1 cup tightly packed brown sugar
– 1/2 cup granulated sugar
– 1 large egg
– 1 tablespoon pure vanilla extract
– 2 cups all-purpose flour
– 1/2 teaspoon baking soda
– 1/4 teaspoon fine sea salt
– 1 cup graham cracker crumbs
– 1 cup semi-sweet chocolate chips
– 1 cup mini marshmallows
Using quality ingredients is key for great flavor. The brown butter adds a nutty taste that really shines. The graham cracker crumbs bring that classic s’mores flavor. The chocolate chips and mini marshmallows add sweetness and gooeyness. For the best results, measure your ingredients carefully. This step ensures your cookies turn out just right. Also, remember to use fresh ingredients for the best taste.
Step-by-Step Instructions
Preparing the Brown Butter
– Melt the unsalted butter in a medium saucepan.
– Cook until it turns golden brown and smells nutty.
Brown butter adds a deep flavor to these cookies. When you melt the unsalted butter, keep a close eye on it. Stir occasionally to help it brown evenly. It will bubble and foam as it cooks. This process takes about 5-7 minutes. Once you see that lovely golden color, remove it from the heat. Let it cool slightly before mixing with the sugars.
Mixing the Ingredients
– Combine the sugars with the brown butter in a large bowl.
– Add the egg and vanilla extract.
In a big mixing bowl, combine the warm brown butter with the brown sugar and granulated sugar. Use a whisk or mixer to blend until smooth. Add in the egg and pure vanilla extract. Stir until everything is well mixed. This mix will be creamy and sweet, forming the base of your cookie dough.
Preparing the Cookie Dough
– Mix the dry ingredients in a separate bowl.
– Combine the wet and dry ingredients until just mixed.
– Fold in the chocolate chips and mini marshmallows.
In another bowl, whisk together the all-purpose flour, baking soda, fine sea salt, and graham cracker crumbs. Make sure there are no lumps. Gradually mix this dry blend into the wet mixture. Stir gently until combined; it should be a sticky dough. Now, fold in the chocolate chips and mini marshmallows. This step gives the cookies that classic s’mores vibe.
Chilling and Baking
– Chill the cookie dough in the refrigerator for at least 30 minutes.
– Preheat your oven to 350°F (175°C).
– Scoop and shape the cookies on lined baking sheets.
Cover the cookie dough with plastic wrap or place it in a container. Let it chill in the fridge for at least 30 minutes. This helps the cookies hold their shape while baking. While the dough chills, preheat your oven to 350°F (175°C) and line your baking sheets with parchment paper. Scoop out the dough and shape it into balls. Space them about 2 inches apart on the baking sheets.
– Bake for 10-12 minutes, until the edges are light golden brown.
The centers may look a bit underbaked, but that’s okay! This gives them a chewy texture. Let the cookies cool on the sheet for about 5 minutes before moving them to a wire rack. Enjoy the gooey goodness of your Brown Butter S’mores Cookies!
Tips & Tricks
Perfecting the Brown Butter
When you brown butter, watch for key signs. First, the butter will start to foam. Then, the color will shift to a warm golden shade. You will smell a nutty fragrance. This process takes about 5-7 minutes. After browning, let the butter cool a bit. Cooling helps prevent the dough from becoming too warm when mixed.
Enhancing Cookie Texture
Chilling your cookie dough makes a big difference. It allows the flavors to meld and firms up the dough. This way, the cookies bake evenly. For a chewy center, bake until the edges are lightly golden. The centers should look a bit underbaked, which gives that perfect texture. To achieve crispy edges, space the cookies well on the baking sheet.
Serving Suggestions
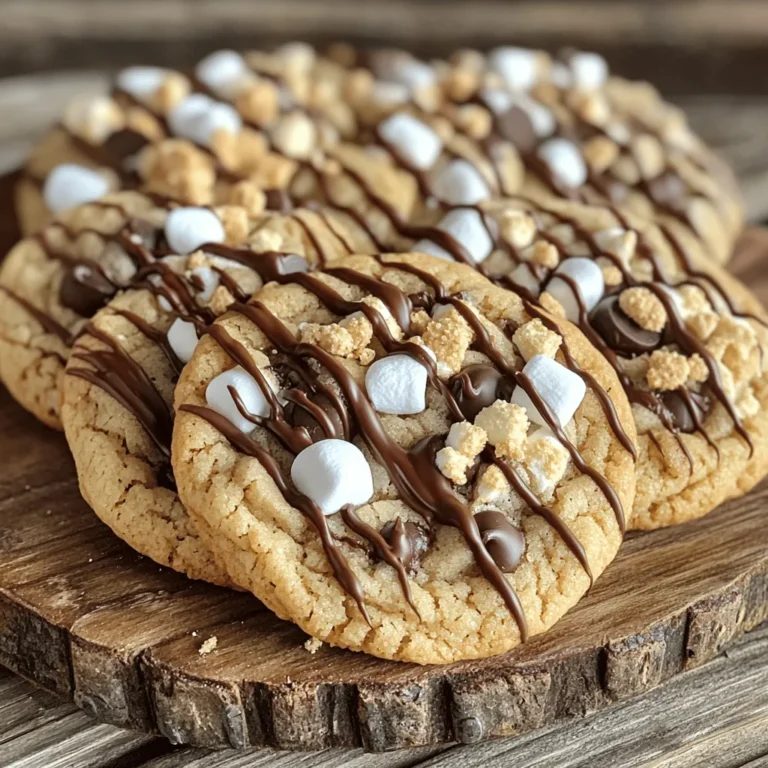
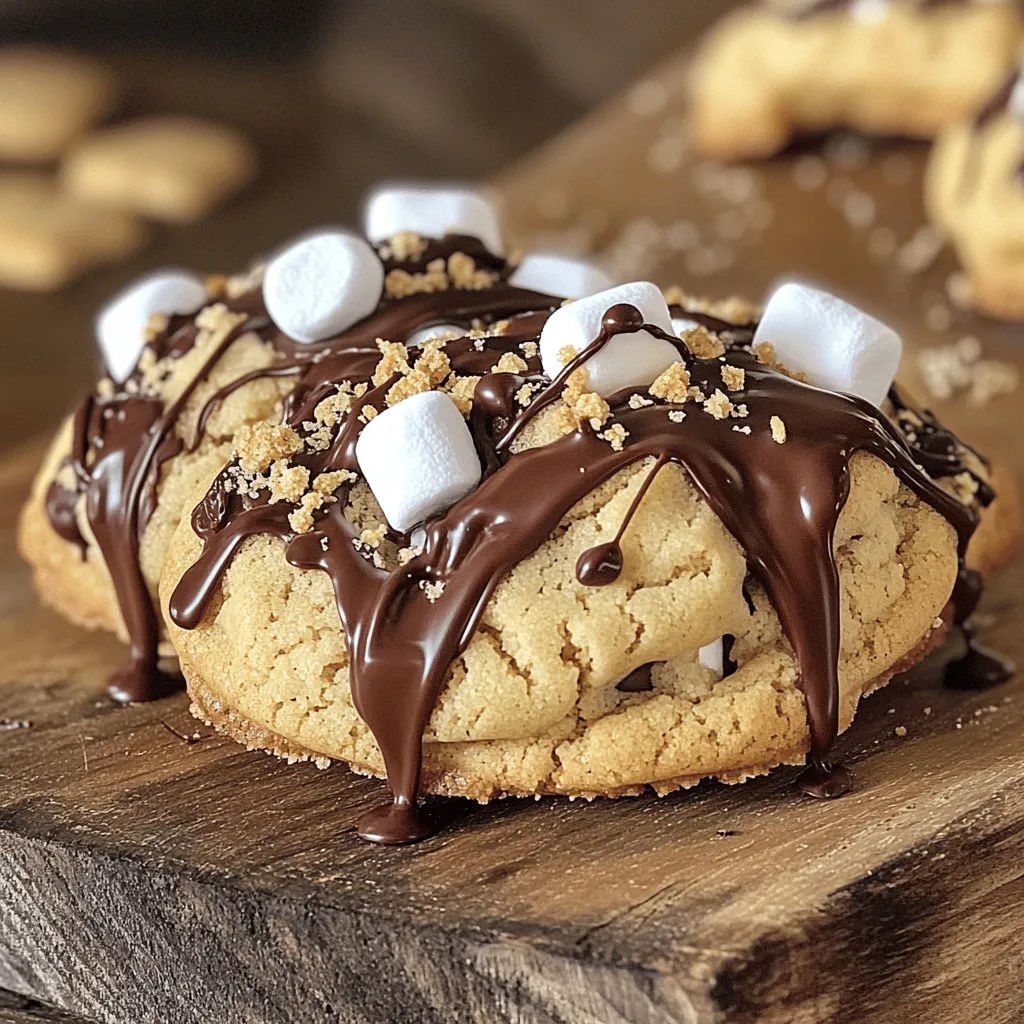
To serve your cookies, use a rustic wooden platter. For a fun twist, drizzle melted chocolate over the top. Sprinkle crushed graham crackers for added crunch. These cookies go great with a glass of cold milk or a scoop of vanilla ice cream. The cold treats balance the warm, gooey cookies perfectly. Enjoy the deliciousness!
Variations
Flavor Variations
You can change the flavors in your Brown Butter S’mores Cookies easily. Try adding nuts like walnuts or pecans for crunch. You can also swap in dark chocolate chips for a richer taste. For those needing gluten-free options, use gluten-free flour and gluten-free graham crackers. This way, everyone can enjoy these cookies.
Alternative Mix-ins
Mixing in different chips or extracts can make your cookies unique. You might use peanut butter chips or mint extract for a fun twist. You can also try different types of marshmallows. Mini s’mores marshmallows add a fun touch, while flavored marshmallows can surprise your taste buds.
Creating Cookie Bars
If you want cookie bars instead of cookies, simply spread the dough in a baking pan. Use a 9×13 inch pan for best results. Bake the bars for about 20-25 minutes. Check for a golden top. Let them cool before cutting into squares. This makes for easy sharing and great for parties.
Storage Info
Storing Baked Cookies
To keep your Brown Butter S’mores Cookies fresh, store them in an airtight container. This helps keep the cookies soft and chewy. Line the container with parchment paper. Place a layer of cookies, then add another layer of parchment. This method prevents sticking. You can also use a cookie jar with a tight lid. Keep the cookies at room temperature for the best taste.
Freezing Cookie Dough
Freezing cookie dough is easy and smart. Make your dough as usual, but do not bake it. Scoop the dough onto a baking sheet. Freeze the scoops for about an hour. Once frozen, transfer them to a freezer bag. This way, you can bake fresh cookies anytime. When ready to bake, preheat your oven. Place the frozen dough on a baking sheet. Add a few extra minutes to the baking time.
Shelf Life
Baked cookies last about one week at room temperature. They may last longer if stored properly. Check for signs that they are stale. If the cookies feel hard or dry, they are past their prime. Look for any off smells or changes in color. If you see these signs, it’s best to toss them. Enjoy your cookies while they are fresh!
FAQs
How do I know when my cookies are done?
To check if your cookies are done, look at the edges. They should be light golden brown. The center may still look soft but will firm up as they cool. You can also gently touch the edge. If it feels set, your cookies are ready. Avoid baking them too long to keep that chewy texture.
Can I substitute ingredients in this recipe?
Yes, you can substitute some ingredients. For example, if you need a gluten-free option, use gluten-free flour. If you have a dairy allergy, try coconut oil instead of butter. You can also swap mini marshmallows for larger ones. Just chop them up to fit in the dough.
What should I do if my dough is too sticky?
If your dough feels too sticky, add a bit more flour. Start with a tablespoon at a time until it feels right. You can also chill the dough longer. This helps it firm up, making it easier to scoop and shape.
Can I use salted butter instead of unsalted?
You can use salted butter, but it changes the flavor. The cookies may taste a bit saltier. If you do use salted butter, reduce or skip the added salt in the recipe. This helps keep the right balance of flavors.
In this blog post, we explored a delicious cookie recipe. We covered the key ingredients, steps to make the dough, and tips for baking. I shared ways to add flavors and variations, and how to store your cookies. Remember, browning the butter gives a rich taste, and chilling the dough helps with texture. Enjoy these cookies fresh or frozen. Now you have the tools to create tasty treats that everyone will love.

