WANT TO SAVE THIS RECIPE?
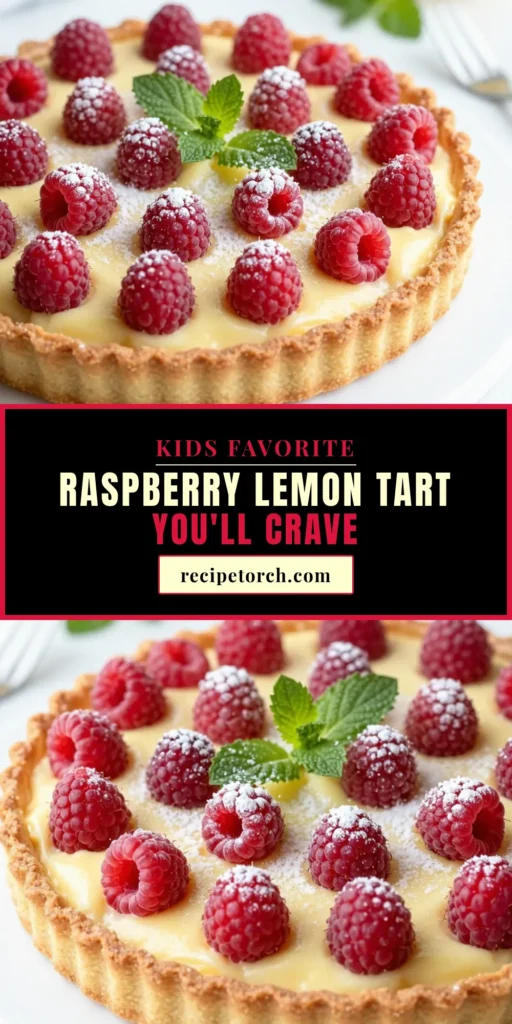
Are you ready to whip up a delightful treat that tastes as good as it looks? This Raspberry Lemon Tart recipe is both simple and perfect for any occasion. With fresh raspberries and zesty lemons, you’ll bring a burst of flavor to your table. I’ll guide you through every step, ensuring you nail the crust and filling. Let’s dive into the sweet world of tarts and make your dessert dreams come true!
Why I Love This Recipe
- Bright Flavor Combination: The tartness of the lemon pairs perfectly with the sweetness of the raspberries, creating a delightful balance that is refreshing and delicious.
- Elegant Presentation: This tart not only tastes amazing but also looks stunning. Its vibrant color and delicate dusting of powdered sugar make it a showstopper for any occasion.
- Simple Ingredients: With just a handful of common ingredients, this recipe is approachable and allows you to create a gourmet dessert without a lot of fuss.
- Perfect for Any Season: Whether it’s a summer picnic or a winter holiday gathering, this raspberry lemon tart fits any season, making it a versatile addition to your dessert repertoire.
Ingredients
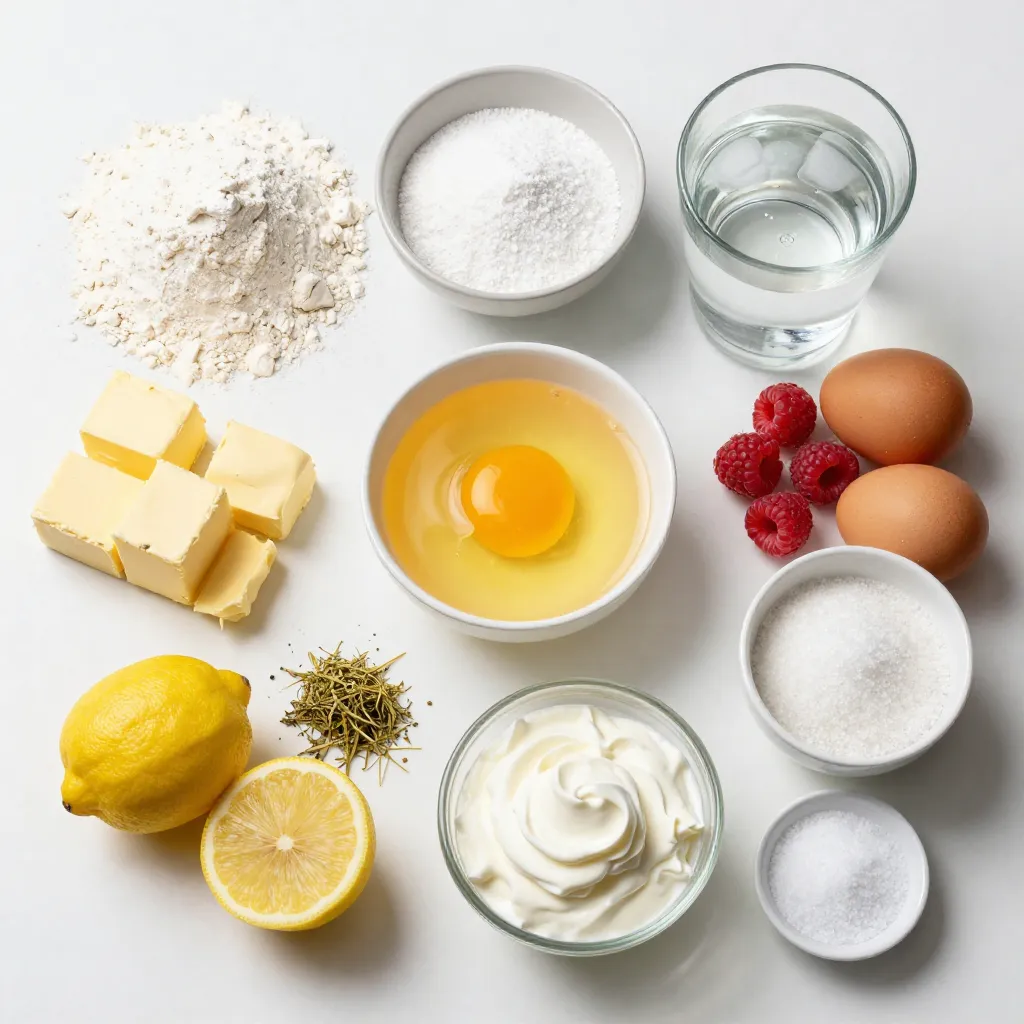
List of Ingredients
– 1 ½ cups all-purpose flour
– ½ cup powdered sugar
– ½ cup unsalted butter, chilled and cut into small cubes
– 1 large egg yolk
– 2 tablespoons ice water
– 1 cup fresh raspberries, rinsed and patted dry
– 1 cup granulated sugar
– 3 large eggs, at room temperature
– ½ cup freshly squeezed lemon juice (about 3-4 lemons)
– Zest of 2 lemons
– ¼ cup heavy cream
– 1 tablespoon cornstarch
– A pinch of salt
Substitutions and Alternatives
If you need to make changes, here are some options:
– Use almond flour instead of all-purpose flour for a gluten-free crust.
– Swap powdered sugar with granulated sugar if you prefer a crunchier topping.
– Coconut oil can replace unsalted butter for a dairy-free version.
– You can use frozen raspberries if fresh ones aren’t available. Just thaw them first.
– For a lighter tart, use Greek yogurt instead of heavy cream.
Tips for Choosing Fresh Raspberries and Lemons
When selecting raspberries:
– Look for bright color and firm texture. Avoid any that are mushy or discolored.
– Check for mold; fresh berries should be clean and dry.
– If you can, smell them. Ripe raspberries have a sweet scent.
For lemons:
– Choose lemons that feel heavy for their size; these are juicier.
– Look for smooth skin; avoid any with blemishes or soft spots.
– If possible, pick organic lemons to get the best flavor and nutrients.
Now that you know the ingredients, you can dive into making a delightful raspberry lemon tart!

Step-by-Step Instructions
Detailed Instructions for Making the Tart Crust
To make the tart crust, start by mixing the flour and powdered sugar in a food processor. Next, add the cold butter cubes. Pulse until the mix looks like coarse sand. Then, add the egg yolk and ice water. Pulse again until the dough comes together.
Now, shape the dough into a flat disc. Wrap it in plastic wrap. Chill it in the fridge for at least 30 minutes. This helps the butter firm up.
Once the dough is chilled, preheat your oven to 350°F (175°C). On a floured surface, roll out the dough. Aim for about ⅛ inch thick. Place it into a 9-inch tart pan. Trim any excess dough and use a fork to poke holes in the bottom.
Next, cover the crust with parchment paper. Fill it with pie weights or dried beans. Bake for 15 minutes, then remove the weights and parchment. Bake for another 10 minutes until light golden brown. Let it cool completely in the pan.
Preparing the Raspberry Lemon Filling
Now, let’s make the filling. In a mixing bowl, whisk together the granulated sugar, cornstarch, and a pinch of salt. Add the eggs one at a time, whisking well after each.
Stir in the lemon juice, heavy cream, and lemon zest. Mix until it’s smooth. Now, gently fold in the fresh raspberries. Be careful not to crush them. You want them to stay whole for a nice look and texture.
Baking and Cooling the Tart
Pour the raspberry lemon filling into the cooled tart shell. Spread it evenly. Bake the tart for 25 to 30 minutes. Look for the edges to be set, with a slight jiggle in the center.
After baking, let the tart cool to room temperature. Then, place it in the fridge for at least 2 hours. This helps the filling firm up for easy slicing.
Tips & Tricks
Common Mistakes to Avoid
– Skipping the Chilling Step: Always chill your dough. This helps the crust hold its shape.
– Overmixing the Dough: Don’t overmix when adding the butter. Aim for a crumbly texture.
– Not Pricking the Crust: Always prick the bottom of the crust. This prevents air bubbles.
– Rushing the Cooling Process: Let the tart cool fully before slicing. This helps the filling set properly.
How to Ensure a Perfect Tart Crust
– Use Cold Ingredients: Keep your butter and egg yolk cold. This leads to a flaky texture.
– Don’t Overwork the Dough: Mix just until combined. Overworking makes the crust tough.
– Flour the Surface: Lightly flour your work surface and rolling pin. This prevents sticking.
– Trim Excess Dough: After shaping, trim any excess dough. This gives a neat finish.
Presentation Tips for Serving
– Dust with Powdered Sugar: Just before serving, add a light dusting of sugar. This makes it look fancy.
– Garnish with Fresh Raspberries: Place a few whole raspberries on top. They add color and freshness.
– Add a Mint Sprig: A small sprig of mint adds a pop of green. It also gives a nice aroma.
– Serve on a Pretty Plate: A nice plate can elevate your tart’s overall look. Choose one that contrasts with the tart’s colors.
Pro Tips
- Chill Your Ingredients: Keeping your butter and mixing bowl cold helps achieve a flaky tart crust.
- Use Fresh Lemons: Freshly squeezed lemon juice provides a bright flavor that bottled juice cannot match.
- Don’t Overmix: When incorporating raspberries, fold gently to avoid breaking them and losing their shape.
- Cool Before Serving: Allowing the tart to cool completely ensures the filling sets properly and enhances the flavor.
Variations
Alternative Fruits to Use
You can swap raspberries for other fruits! Consider using blueberries, blackberries, or strawberries. Each fruit adds a unique taste. Blueberries give a sweet flavor, while blackberries add a bit of tartness. Strawberries offer a classic touch. You can even mix fruits for a colorful look. Try different combinations to find your favorite.
Gluten-Free Tart Crust Options
If you need a gluten-free crust, there are great options. Use almond flour or gluten-free all-purpose flour. Both work well to create a tasty base. Combine the flour with cold butter and sugar just like in the original recipe. Make sure to follow the same steps for mixing and baking. You’ll still enjoy a delicious tart!
Different Flavor Enhancements
Want to add more flavor? Try adding herbs or spices. Fresh mint or basil can give a refreshing twist. You can also add a touch of vanilla extract to the filling. For a richer taste, try adding a bit of cream cheese. Mix it in with the lemon and eggs for a creamy texture. These small changes can make a big difference!
Storage Info
How to Store Leftover Tart
Store the leftover raspberry lemon tart in the fridge. Use an airtight container or cover it with plastic wrap. This keeps it fresh for up to three days. Make sure to avoid any strong-smelling foods in the fridge, as they can affect the tart’s flavor.
Freezing Instructions
You can freeze the tart for longer storage. First, let it cool completely. Wrap the tart tightly in plastic wrap, then in aluminum foil. This prevents freezer burn. It can last for about two months. When ready to eat, thaw it in the fridge overnight.
Reheating Tips for Best Results
To reheat the tart, preheat your oven to 350°F (175°C). Place the tart on a baking sheet. Heat for about 10-15 minutes. This warms it through without making it soggy. You can also serve it cold, as it tastes great chilled!
FAQs
How to Tell When the Tart is Done Baking?
You can tell the tart is done when the filling looks set at the edges. The center should still jiggle a bit. This slight movement means it will firm up as it cools. If the edges puff up, that’s normal. Just keep an eye on the color. The top should be light and golden, not dark or burnt.
Can I Make the Tart Ahead of Time?
Yes, you can make the tart ahead of time. I often prepare it a day early. Just bake and cool it fully. Then, cover it well and store it in the fridge. This allows the flavors to blend nicely. You can serve it cold or at room temperature. Just remember to dust the top with powdered sugar before serving.
What Can I Serve with Raspberry Lemon Tart?
This tart pairs well with several tasty options. Here are some ideas:
– A dollop of whipped cream adds creaminess.
– A scoop of vanilla ice cream gives a sweet touch.
– Fresh berries on the side enhance the tart’s flavor.
– Mint leaves add a refreshing note.
– A cup of tea or coffee balances the sweetness.
Feel free to mix and match these ideas!
This article covered how to make a delicious raspberry lemon tart. You learned about the best ingredients and some helpful substitutions. I shared tips for picking fresh fruit and step-by-step instructions for the crust and filling. We also explored ways to avoid common mistakes, make variations, and store your tart.
For a tasty dessert, this tart is a win. Enjoy making it and impressing everyon
Raspberry Lemon Tart
A refreshing tart featuring a buttery crust filled with a smooth lemon custard and fresh raspberries.
Prep Time 30 minutes mins
Cook Time 40 minutes mins
Total Time 2 hours hrs 10 minutes mins
Course Dessert
Cuisine American
Servings 8
Calories 250 kcal
- 1.5 cups all-purpose flour
- 0.5 cups powdered sugar
- 0.5 cups unsalted butter, chilled and cut into small cubes
- 1 large egg yolk
- 2 tablespoons ice water
- 1 cup fresh raspberries, rinsed and patted dry
- 1 cup granulated sugar
- 3 large eggs, at room temperature
- 0.5 cups freshly squeezed lemon juice (about 3-4 lemons)
- Zest of 2 lemons
- 0.25 cups heavy cream
- 1 tablespoon cornstarch
- A pinch of salt
Make the Tart Crust: In a food processor, combine the flour and powdered sugar. Add the chilled, cubed butter and pulse until the mixture resembles coarse sand or small peas.
Add Moisture: Incorporate the egg yolk and ice water into the mixture. Pulse again until the dough begins to form a cohesive mass. Shape the dough into a flat disc, wrap it in plastic wrap, and refrigerate for at least 30 minutes to firm up.
Preheat the Oven: Set your oven to 350°F (175°C) while the dough chills.
Roll and Shape the Dough: On a lightly floured surface, roll out the chilled dough to fit a 9-inch tart pan, ensuring it’s about ⅛ inch thick. Press the dough gently into the pan, trimming any excess that hangs over the edges. Use a fork to prick holes in the bottom to prevent bubbling during baking.
Blind Bake the Crust: Cover the crust with a sheet of parchment paper and fill it with pie weights or dried beans to hold it in place. Bake for 15 minutes, then carefully remove the weights and parchment. Continue baking for an additional 10 minutes, or until the crust is light golden brown. Let it cool completely in the pan.
Prepare the Filling: In a mixing bowl, whisk together the granulated sugar, cornstarch, and a pinch of salt until combined. Add the eggs one at a time, whisking well after each addition. Stir in the freshly squeezed lemon juice, heavy cream, and lemon zest until the mixture is smooth and homogenous.
Incorporate Raspberries: Gently fold the fresh raspberries into the lemon mixture, being careful to preserve their shape and not crush them.
Bake the Tart: Pour the raspberry-laden lemon filling into the cooled tart shell and spread it evenly. Bake for 25-30 minutes, or until the filling is set around the edges but still has a slight jiggle in the center.
Cool and Serve: Allow the tart to cool to room temperature before placing it in the refrigerator for at least 2 hours, allowing the filling to firm up.
Just before serving, dust the top of the tart with a light coating of powdered sugar. Garnish with a few whole raspberries on top and a sprig of fresh mint.
Keyword dessert, lemon, raspberry, tart
WANT TO SAVE THIS RECIPE?